Tuesday, December 31, 2013

Mini apple pies (with a simple pie dough recipe)

Today is New Year's Eve 2013. Our last day at the beach (sigh). What always happens on the last day at the beach?! Clean out the fridge and pantry. Mama always says, "We're not taking anything home!" (She also says not to call her 'mama'!! But I do anyways). :-). Needless to say, we had several apples left to eat. As if we needed any more desserts to consume, I decided to make mini apple pies. I got a little creative because as I said, it's 'eat the leftovers' not 'run to the store for the ingredients!'

I looked up a simple pie dough recipe (using what I had which was self rising flour and not the typical all purpose flour used in pie dough). 

Simple Pie dough
1 cup flour (self rising worked fine - just don't add salt)
1/3 c Crisco (or butter)
2-3 Tbsp cold water

Using pastry cutter or two knives, cut Crisco into flour. Add water to combine everything in to a dough ball. I used a fork to toss everything together. (I also made 2 dough balls). 

Apple pie filling
3-4 apples peeled and cored; chopped in to small pieces (Granny Smith is traditionally used in pies but use what ya have)
2 Tbsp butter
Pinch of salt
2-3 Tbsp sugar
Dash of cinnamon
Dash of nutmeg
Melted caramel (optional)

Preheat oven to 400. Melt butter in cast iron skillet (if you have one; something big enough for the apples). Toss apples, sprinkle salt, and let cook a few minutes. Add sugar and spices. Let apples cook until tender. If you have caramel you can add at the last minute just until melted (again, cleaning out the pantry we had caramel candies so I decided to experiment. You could totally omit the caramel). 

Transfer to a dish and allow apple mix to cool down. 

Meanwhile, cut you dough in half or thirds (I did). Roll out to flat disks. Maybe 6-8 inches in diameter. 

Add a few spoonfuls of apple mix to center. Fold over dough and seal edges. 

Brush an egg wash over top (egg and water). Cut slits in top. Bake for about 30 minutes. 

Not bad for improvising!! 


Thursday, October 31, 2013

Apple Slab Pie

What to do with an excessive amount of hand-picked apples?! Make a slab pie! Reece and I went to North Georgia this past weekend and stopped to pick apples at, no joke, BJ Reece Apple Orchard! What are the odds?! And, they spell it right :) 

I was contemplating what to make with all those apples before they went bad, when I got the email...an email from the blog, Smitten Kitchen, that I subscribe to (thank you for sharing Ali Barden). (See Smitten Kitchen's recipe here  http://smittenkitchen.com/blog/2013/10/apple-slab-pie/). I thought, 'this is perfect! I can use up the apples, and I have something to take to small group Wednesday (thank you Small Group for being my taste testers!)!'


Ingredients
CRUST
3 3/4 c. all purpose flour
1 + 1/2 Tbsp. sugar
1 + 1/2 teaspoon salt
3 sticks COLD, unsalted butter
1 c. COLD water (I even stuck it in the fridge for a few minutes!)

FILLING
about 8 cups apples - peeled and diced in to 1/2" pieces
squeeze of lemon juice (to keep apples from turning)
3/4 c. sugar
1 teaspoon cinnamon
1/4 tsp. nutmeg (*NOTE: I substituted Penzy's pumpkin pie spice for the nutmeg and allspice)
1/4 tsp. allspice
3 Tbsp. cornstarch
1/8 tsp. salt

Steps (photos at bottom - sorry for the formatting; I am still having issues with adding captions; be sure to read the photos left to right)
Preheat Oven to 375 degrees.

CRUST (can make 1-2 days in advance; need enough time for the dough to chill)
1. Mix flour, sugar, salt.
2. Using pastry cutter (or two knives - see my technique in "Biscuit Heaven"), cut cold butter in to flour mix until you get pea-sized mix.
3. Slowly add cold water, folding dough until you get a workable ball. Knead only 3-4 times
4. Cut dough in half.
5. Wrap each half in plastic wrap and slightly flatten out to a disk shape. Let chill in fridge at least 1 hour (I let mine chill over night)

FILLING
1. Toss apples with lemon juice. Mix apples, sugar, spices, cornstarch in large bowl.

ASSEMBLY
1. Remove dough from fridge. Working quickly, roll out dough to fit your pan, leaving enough 'extra' on the edges to stand up the side of the pan. Smitten Kitchen uses a baking sheet with a 1" depth...since I didn't have such, I used a cake pan with a 2" depth. Worked just as well.
2. Spray pan with butter spray. Place first dough in bottom of pan.
3. Add apple filling.
4. Roll out 2nd dough and place atop apple filling. Tuck edges in to bottom dough edges. (Does that even make sense?!)
5. Brush top with egg wash and cut slits with knife to allow to heat flow.
6. Bake in oven 45 minutes - 1 hr.

GLAZE
Powdered sugar + water; mix well. want consistency that is pour-able but not too runny

EAT
7. Let cool for about 45 minutes.
8. Served best with vanilla ice cream :-)

Dough ingredients
Baker's tools
Cut butter in to flour mix


crumbly mixture


Saturday, September 14, 2013

Summer Shrimp Stir Fry

I owe this one to my new favorite Food Network star, the Pioneer Woman, Ree Drummond (http://thepioneerwoman.com/cooking/2010/06/summer-stir-fry/). I love everything about watching her show....the setting, the simplicity of her cooking, and her low-key, home-on-ranch personality. As you all know, I love simple meals that don't require a ton of ingredients. Here's a quick, on the healthier side, option for dinner.

Summer Shrimp Stir Fry


Ingredients:
2 Tbsp butter
2 Tbsp olive oil
minced garlic (about 2 tsp or however much you like garlic!)
Shrimp (fresh is always better, but I cheated and used frozen ones that I thawed!)
1 red bell pepper, sliced
2 zucchini, sliced
2 ears of corn, kernels sliced off
cherry tomatoes, cut in half
salt and pepper
lemon juice
parsley for garnish

Instructions (photos below):
1. In a large skillet, melt 1 Tbsp butter and 1 Tbsp olive oil. When butter melts and oil is hot, add minced garlic and sautee for just a few seconds.
2. Add shrimp (enough to fill the pan and feed you and your man!). Cook for about 3 minutes, flipping them mid-way. Remove from pan and put on plate. (Note: do not clean the skillet after removing the shrimp)
3. Add remaining butter and olive oil to skillet. Add bell pepper and cook for about 1-2 minutes (not very long, because they will continue to cook).
4. Leave bell pepper in pan, but move to sides of pan creating a ring (See photo). Add zucchini in the middle and cook for a minute...be sure to flip them as well.
5. Move zucchini to side as well, add corn kernels and tomoatoes to center and toss around (really just want these heat through). Add a little salt and pepper.
6. Add the shrimp back to the pan with all of the veggies and stir around for just a minute.
7. Remove from heat and garnish with parsley and fresh-squeezed lemon juice.

Ingredients prepped
Step 1: Cook shrimp
sautee red bell pepper
pepper to side; flipping zucchini

Add corn and toss

Add tomatoes, salt, pepper
Add shrimp and cook for just a minute
Add parsley and lemon juice, ready to serve


Tuesday, July 30, 2013

Stuffed Mushrooms and/or Pepper

Last week, I was looking for a quick, healthier option to make for dinner. Below is what I came up with!

Sausage stuffed portobello mushrooms one night and stuffed peppers (green bell and jalapeno) the next!
stuffed portobello mushroom
Stuffed pepper after cooking in oven

INGREDIENTS:

pack of sausage
diced yellow onion
green bell peppers
minced garlic
diced tomato
bread crumbs
seasonings - Italian seasoning; anything you like!

Preheat oven to 375 degrees. 
STEP 1: Cut top of green bell pepper off. Remove the 'guts' and stand up in a oven-safe dish. Dice the top of the pepper and add to dish in Step 2. 
STEP 2: Brown sausage in cast iron skillet. Add yellow onion and top of bell pepper; sautee for a few minutes. Drain sausage mixture and let cool. Transfer to bowl.
STEP 3: Toss together sausage mixture with minced garlic, tomato, bread crumbs and seasonings. 
STEP 4: Stuff pepper (or mushroom) with sausage mixture.
Bake for 30 minutes.  
STEP 5: Optional: Sprinkle cheese over top at the very end of the baking process and let melt for a few minutes. 
Stuffed pepper before going in to oven


Saturday, July 27, 2013

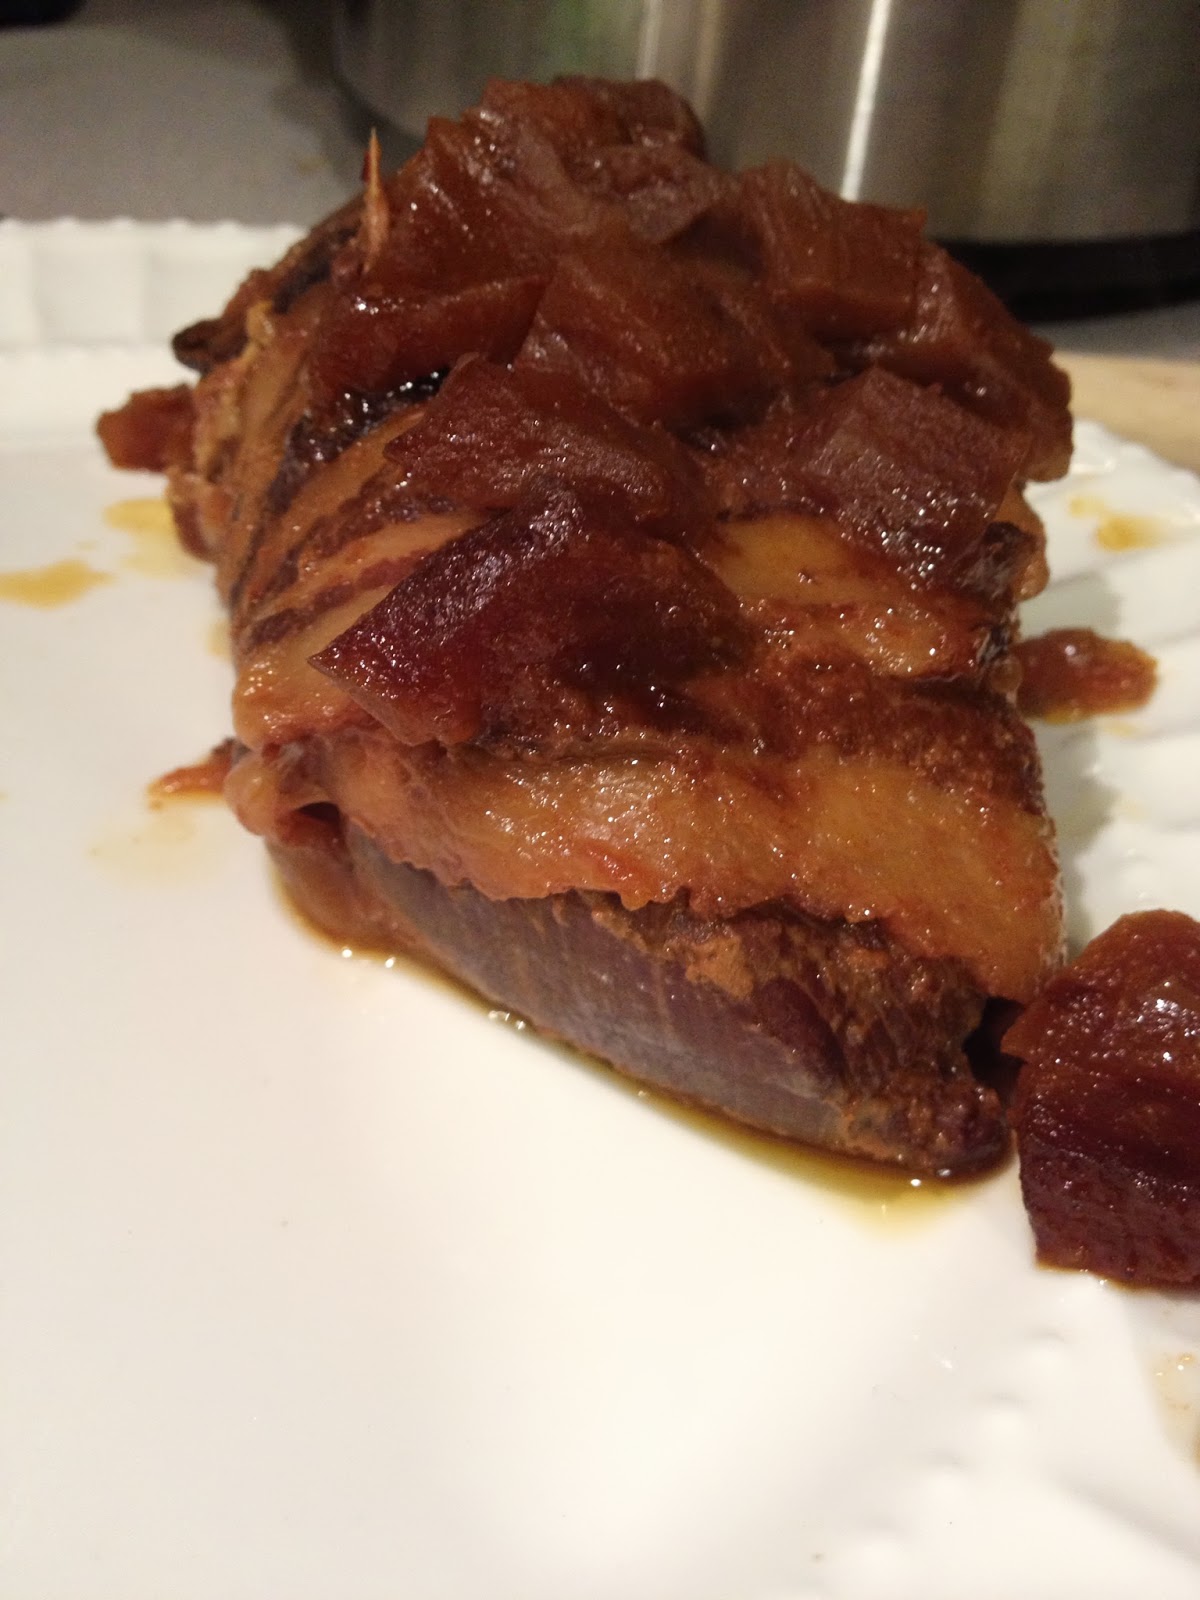
Bacon-Wrapped Apple BBQ Chicken - Crock-pot recipe

Most of my recipes here lately have come from Pinterest inspirations. I look for the easy, quick meals that sound appetizing. I also have to keep in mind my picky husband (I doubt he will read my blog, but shhh!, don't tell him I told the world he's picky!) I know I am safe when I choose a dish with bacon. What man doesn't melt when you say 'bacon's for dinner'?! My version didn't turn out quite as pretty as the Pinterest picture, but it was still appetizing.

Bacon-wrapped, apple-topped chicken
INGREDIENTS:
3-4 chicken breasts
1 cup BBQ sauce
1/4 cup light brown sugar
1/8 cup lemon juice
3-5 Gala apples (depends on the size; if they are small, maybe 5, if they are larger, may only need 2)
8ish slices of bacon (un-cooked)

STEP 1: Wrap 3-4 pieces of chicken with about 4 slices of un-cooked bacon.
STEP 2: Chop 2-3 Gala apples in to bite-sized pieces.  Mix BBQ sauce, brown sugar, lemon juice, and apples in a bowl.

STEP 2: Lay chicken on bottom of greased crock pot. Pour mixture over the top. Cook 6-7 hours on low. 


 Recipe from: www.chef-in-training.com


Friday, July 19, 2013

Some things are better left FRIED!

While I consider myself culturally diverse, my roots don't lie....I'm a Southern girl at heart. I eat savory buttermilk biscuits, I like my tea sweet, and I eat my veggies...sometimes those veggies are just better fried....like OKRA, my favorite veggie. (Ok Mom...I put a healthier option at the bottom...roasted veggies).

Fried Okra and zucchini
Last weekend I visited the Marietta Farmer's Market on our square and bought fresh okra, squash, and zucchini. I decided that since I had just met the person who hand-picked these green, awkward-looking veggies out of the ground, I better give them proper tending to....that means FRIED OKRA (and I experimented with fried yellow zucchini...quite tasty!).

First I washed and dried the okra, cut off the nubby end, and sliced in to about 1/2 - 1" pieces. I soaked them in buttermilk for maybe an hour, rolled them in Fish Fry, then dumped them in to piping hot oil. Mmmm...mmmm...mmm! (See below for complete ingredients).


Ingredients:
Fresh okra (or other veggies)
buttermilk (enough to cover the okra pieces)
Fish Fry
Seasoned Salt (or other spices)
peanut or vegetable oil for frying
cast iron (dutch oven) skillet

FRYING VEGGIES
Step 1: Cut up okra in to pieces as seen above. (For zucchini, cut off ends and slice in to wedges as seen in first picture; then follow remaining directions)
Step 2: Pour buttermilk over okra and let sit as long as possible. 30 min - 1 hr works.
Step 3: Meanwhile, heat up your oil. We love using our cast iron skillets so that's what we used. Oil should reach about 350 degrees or until you throw a pinch of flour in the oil and sizzles like it's supposed to!
Step 4: Remove okra from buttermilk (draining it as you do so...I used a fork to scoop them out and drain). Step 5: Toss in mixture of Fish Fry and seasoned salt or whatever spice you like. 
Step 6: Carefully add okra to hot oil. Don't crowd the skillet. A little at a time is a good idea. They are done when they start to float at the top and are golden brown.
Step 7: Carefully remove from oil and let drain on paper towels. I invented a draining contraption using a baking sheet on the bottom lined with a paper towel, then one of those cooling racks you use for cookies topped with more paper towels (overkill?! Nah!)

ROASTED VEGGIES
This is a quick side to any meal. Pre-heat oven to 325 degrees. Wash, dry, and cut your veggies. Toss in a little olive oil and seasonings (I think I used seasonal salt). Roast for about 30 minutes.


Roasting squash, zucchini, carrots

Roasting okra

Roasted veggies

Roasted okra with slow cooker cubed steak

Tuesday, July 16, 2013

Breakfast on the go! - Breakfast Muffins

Breakfast on the Go! - Breakfast Muffins
Click here for recipe from Pinterest; Original recipe by Betty Crocker 

I came across this recipe the other day on Pinterest and thought, how convenient?! This would be perfect for a brunch, quick breakfast-to-go if you are in a hurry, or if you have kids, a fun way to start their day. I am going to experiment with the recipe after my co-worker made some suggestions, but for now, I will share the basic steps.


INGREDIENTS
1 20 oz. bag refrigerated hash browns (found them next to the eggs in Publix)
2 Tbsp. veggie oil (or olive oil)
salt and pepper

6 eggs
2 Tbsp. milk
1 c. crispy cooked bacon (crumbled)
3/4 c. shredded Cheddar cheese

DIRECTIONS
Step 1: Cook Bacon. Line cookie sheet with tin foil. Lay pieces of bacon on sheet and place in COLD oven. Then turn up to 400 degrees. Bake about 18-20 minutes or until it reaches a good crispiness. Don't over or under crisp it ;0)  Remove bacon and let drain on paper towels. 

Step 2: While bacon is cooking, line a 12-count muffin pan with FOIL muffin liners. Do not try using the paper liners just because you have them - believe me, I tried and the product stuck to the paper. Spray the liners with cooking spray. 

Step 3: Prep and bake hash browns. Toss hash browns, oil, salt, and pepper. Fill all muffin cups with mixture. You may have to press the taters in to the cups to make it all fit. The cups will be filled to the top with the hashbrown mixture. Bake 45 - 55 minutes until they reach a golden brown. 

Remove hashbrowns from oven and press down firmly in to the cups. Use a large spoon or the bottom of a measuring cup. 


Step 4: Prep and bake egg mix. Beat eggs and milk. Add cooked bacon (or for a variation, try cooked sausage - thanks BY!) and cheese and stir. Top each hash brown cup with the egg mixture...a little less than about 1/4 cup each. 


Bake about 15 minutes or until knife inserted in to muffin comes out clean. 

Serve with syrup, ketchup, or sriracha sauce (original recipe said so!). 

Let them cool then store in the fridge. I would imagine you could freeze them too and pull them out as needed. Just heat up the oven and let them warm up for about 15 minutes.